oRanges Viewer
The oRanges Viewer is designed to host and display online a range tree created in the Range Constructor tool of oRanges Calculator.
The platform consists of the oRanges Viewer client application and a personal oRanges Viewer Web account for working with the range tree in a web browser. You can check it out using demo access:
Web: https://holdemranges.com/orangesviewer
Login: demo@holdemranges.com
Password: demo2022
The oRanges Viewer client is an application that is installed on a computer and is designed to create an export file from the range tree, and also serves as a tool for synchronizing the license data of the program with an online account.
There are versions of the application for Windows and macOS.
Using the oRanges Viewer client you can create an online account. The created export file must be transferred directly to the web browser page. Viewing the range tree is carried out directly in your web browser.
Convenient tree view in web browser allows you to quickly and easily find ranges you need. It is possible to publish your ranges in the public section of the online system.
|
oRanges Viewer client
License key validation
License key activation
License modification key
oRanges Viewer client
Create Account
Change password
Update Expiration date
Settings
|
oRanges Viewer Web account |
oRanges Viewer client
License key validation
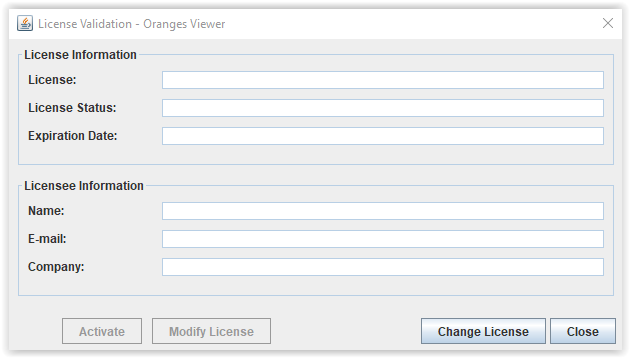
When you first start the program, a window appears for validating and activating the license key. The license key must first be validated and then activated.
To enter a license key, press the Change license button.
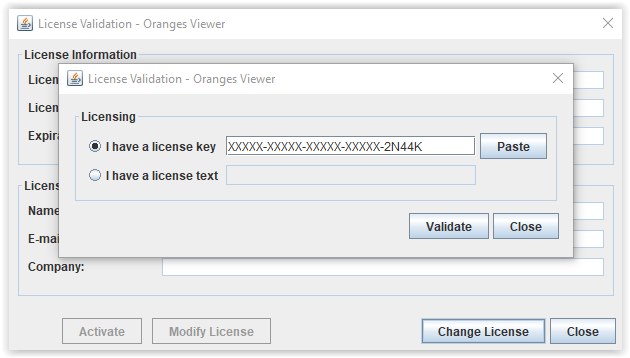
Enter the license key in the I have a license key field.
If you previously copied the license key to the clipboard, you can click the Paste button to paste the key. To validate the key, click the Validate button.
License key activation
After successful validation of the license key, the Activate button becomes active.
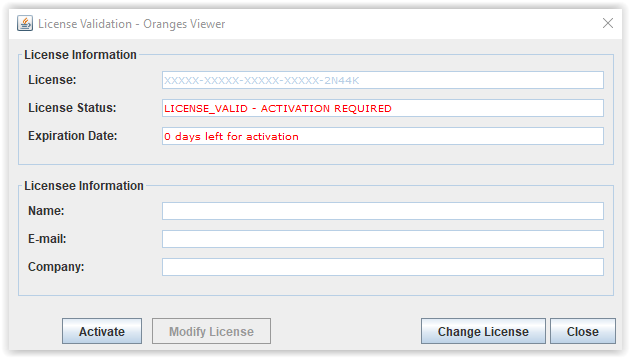
To activate the license key, press the Activate button.
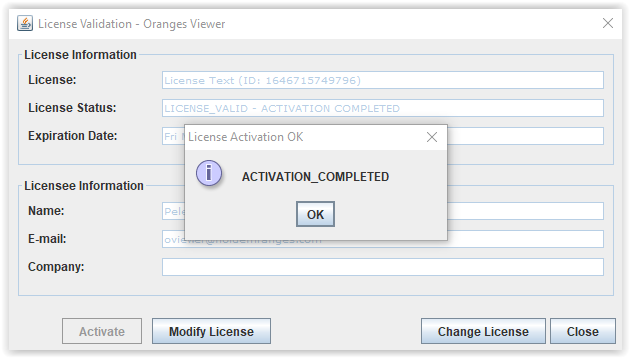
After the key was successfully activated, click the Close button. The license activation window will be closed and the main oRanges Viewer client window will be opened.
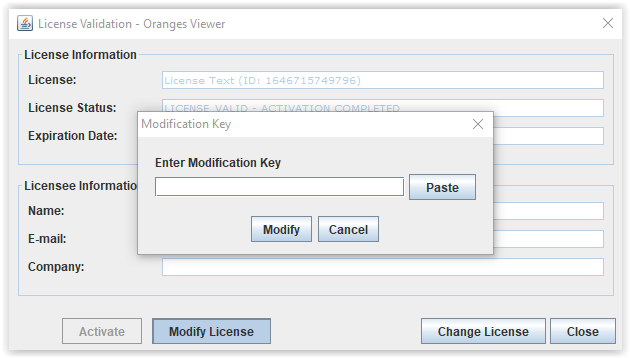
License modification key
If the license has not yet expired and you have purchased a license modification key, you must activate it. To activate the license modification key, you must click the Modify license button, enter the key and click the Modify button.
oRanges Viewer client
The oRanges Viewer client is designed to create and modify an account required to work with the Oranges Viewer online platform and export a file with information about the range tree to Range Constructor.
In order to start working with the online system, you need to create an online account and set a password to enter the system.
Login address: https://holdemranges.com/orangesviewer
The login for logging into the system matches the email address given when purchasing the key for the Oranges Viewer client.
To export a range tree information file to Range Constructor, click the Export button and specify the folder where you want to save the file: rctree.json
The default folder for saving the rctree.json export file is C:\Users\Peleg\Oranges Calculator. It can be changed in the File -> Settings menu.
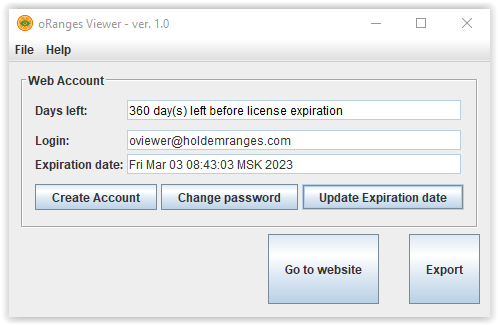
Create Account
Click on the Create Account button to create an account in the online system. Set the password in pop-up window.
If the account was created earlier, then there is no need to create it again. To change the password, use the Change password button.
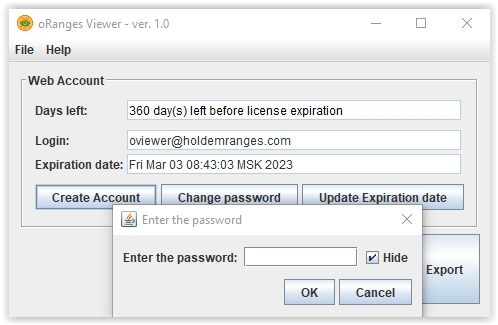
Change password
Click the Change password button to change the password for logging into the online system. In the pop-up window set a new password for the online account.
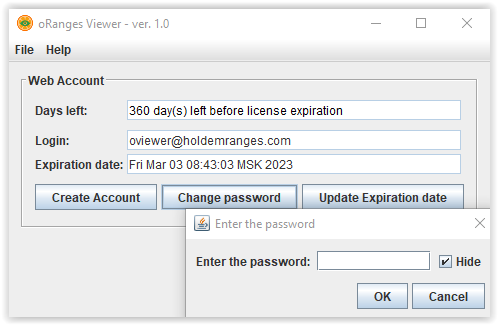
Update Expiration date
If you have purchased a license modification key and activated it, you must synchronize the license expiration date of the oRanges Viewer client with the license expiration date of the online account.
Click the Update Expiration date button to synchronize the license expiration dates.
Settings
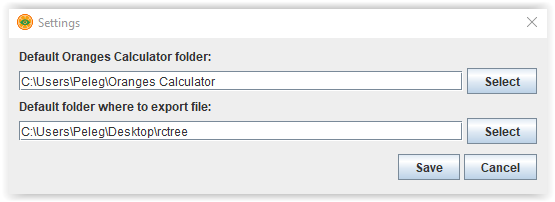
By default, the oRanges Viewer client looks for files that store information about the range tree in Range Constructor tool in the default installation folder for oRanges Calculator:
C:\Users\Peleg\Oranges Calculator
If you have installed oRanges Calculator in a non-default folder, you must specify it. To do this, select File -> Settings in the main menu and specify the required folder in the pop-up window.
It is possible to specify a folder for the exported file. To do this, select File -> Settings in the main menu and specify the required folder in the pop-up window.
oRanges Viewer Web account
Upload data file
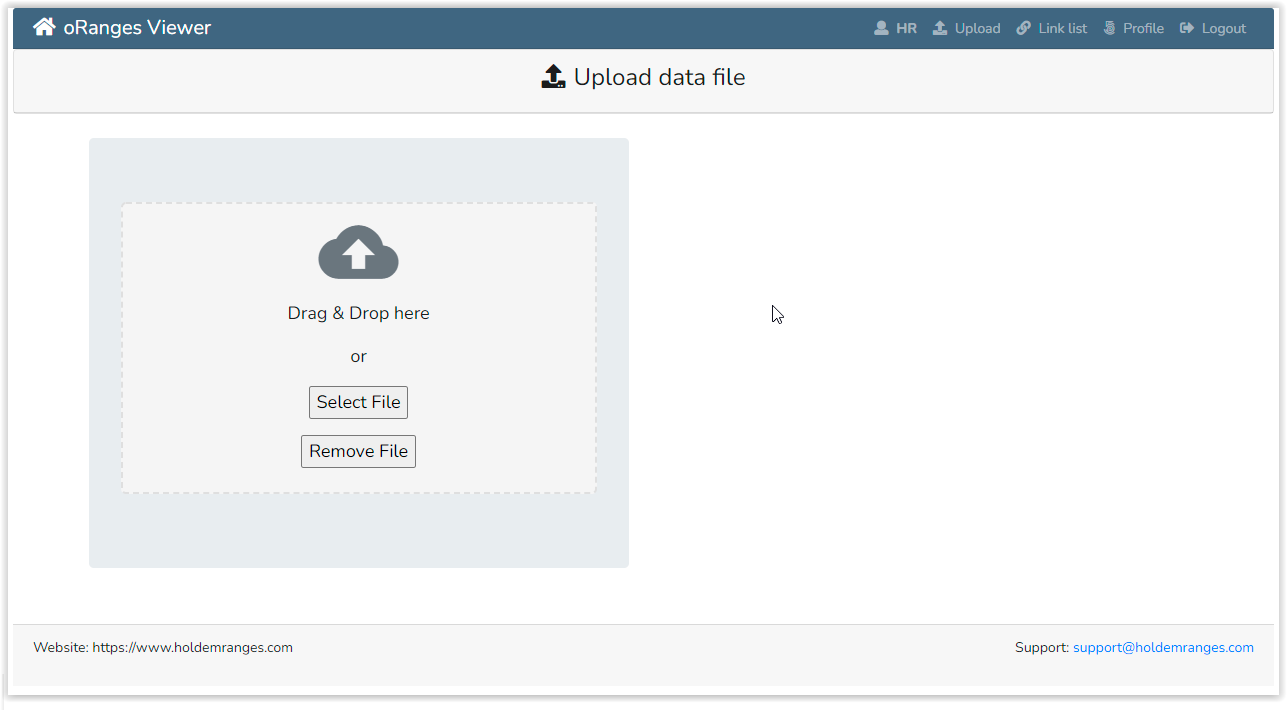
When you log in for the first time, you will be automatically redirected to the page for uploading the export file to the system. Drag the generated by the oRanges Viewer client export file directly into the light gray rectangle and the upload to the system will start automatically. When the download is complete, click on the 'Go to main' link to go to the main page, or click on your Username in the top menu of the page.
The file can be imported into the system manually by clicking the 'Select File' button and selecting the required file. It is possible to delete the current data file. To do this, click the 'Remove File' button.
Range viewer
After uploading the export file to the system, you can start viewing your ranges.
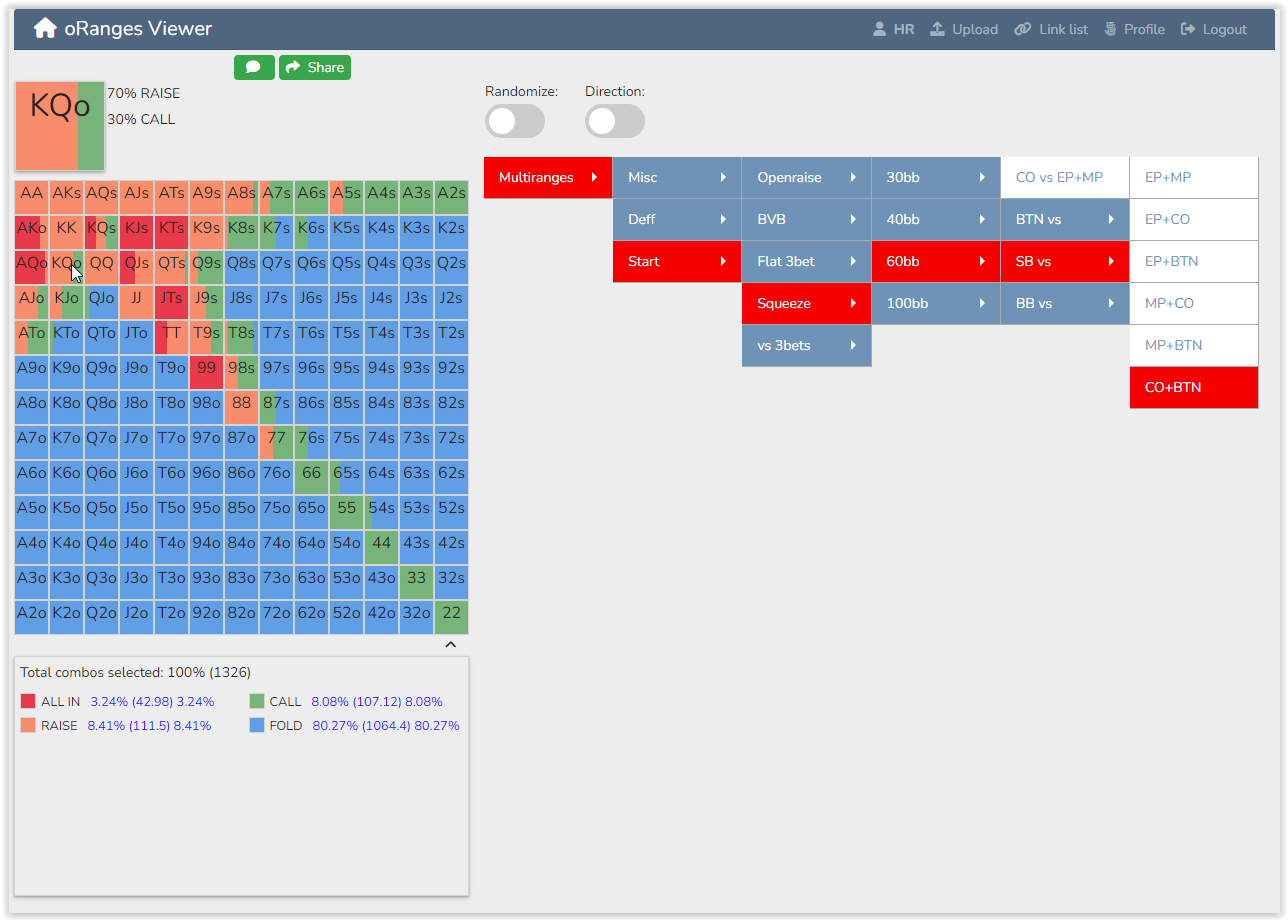
There are 2 options of tree representation - with a horizontal scan and with a vertical scan. To change the view, click on the 'Direction' radio button.

When you select a specific range in the tree, it is displayed in a matrix. When you hover over any hand in the matrix, you can see an enlarged view of color codings and percentages in the square above the matrix. If the hands in the matrix have multiple color codings, then the 'Randomize' button can be used to randomly generate a color coding according to percentages. In this case, a random number generator is used to select a color. This option can be used if you want to choose a random hand to play based on percentages.

Public link
The system has a public section where you can share your ranges with your friends. Press the 'Share' button above the matrix to publish the range selected in the matrix. A link to the created page will appear in a pop-up window. You can create up to 100 public links.
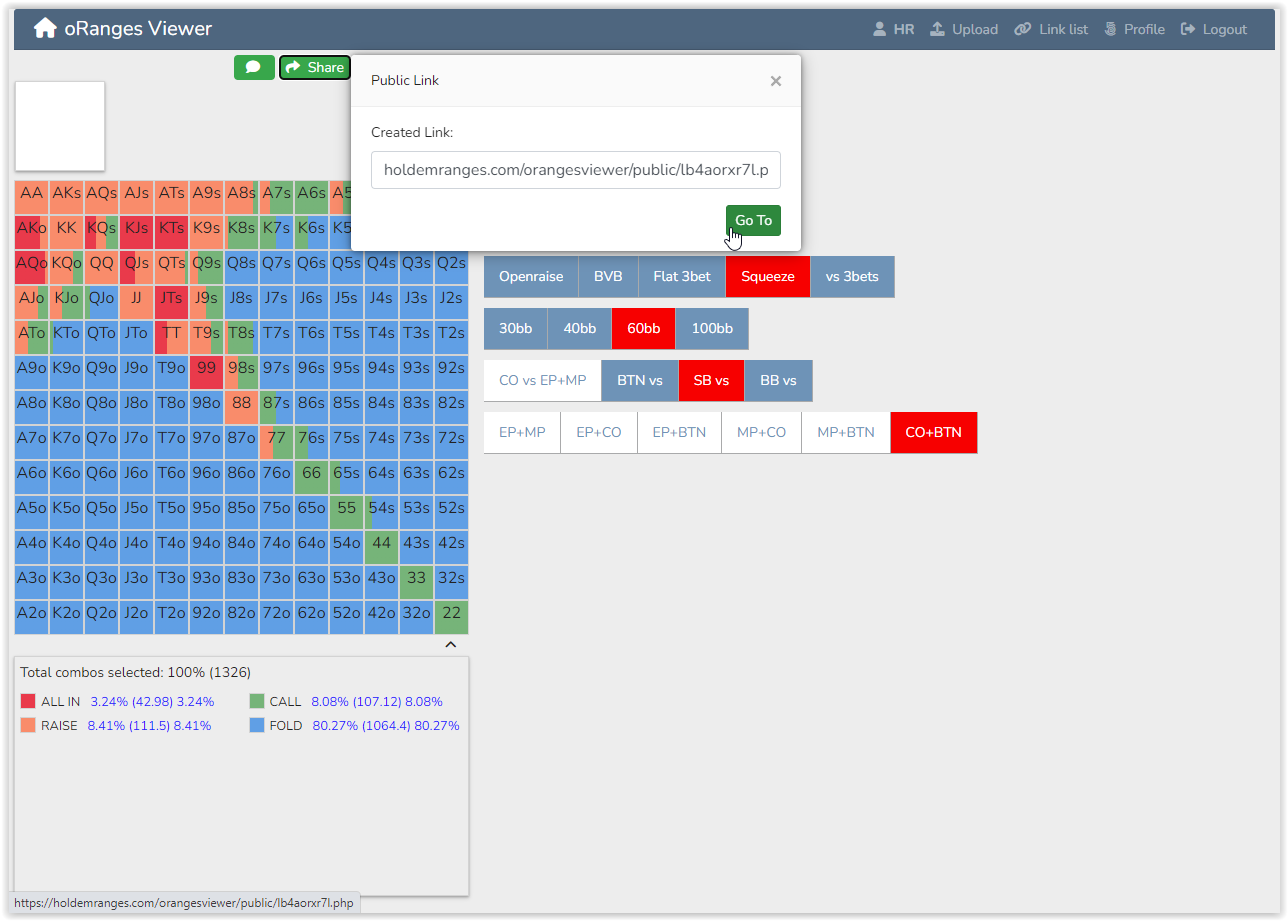
It is possible to add a comment to the published range. To enter a comment, click the button with the icon to the left of the 'Share' button above the matrix and enter a comment in the pop-up window. This comment will be attached to the published page each time you click on the 'Share' button. Delete the comment or change it to another one the next time you click on the 'Share' button.

A list of all the public links you have created can be found in the 'Link list' section. Select 'Link list' from the menu and a list of links will be opened in a table, sortable by columns and searchable by keyword.
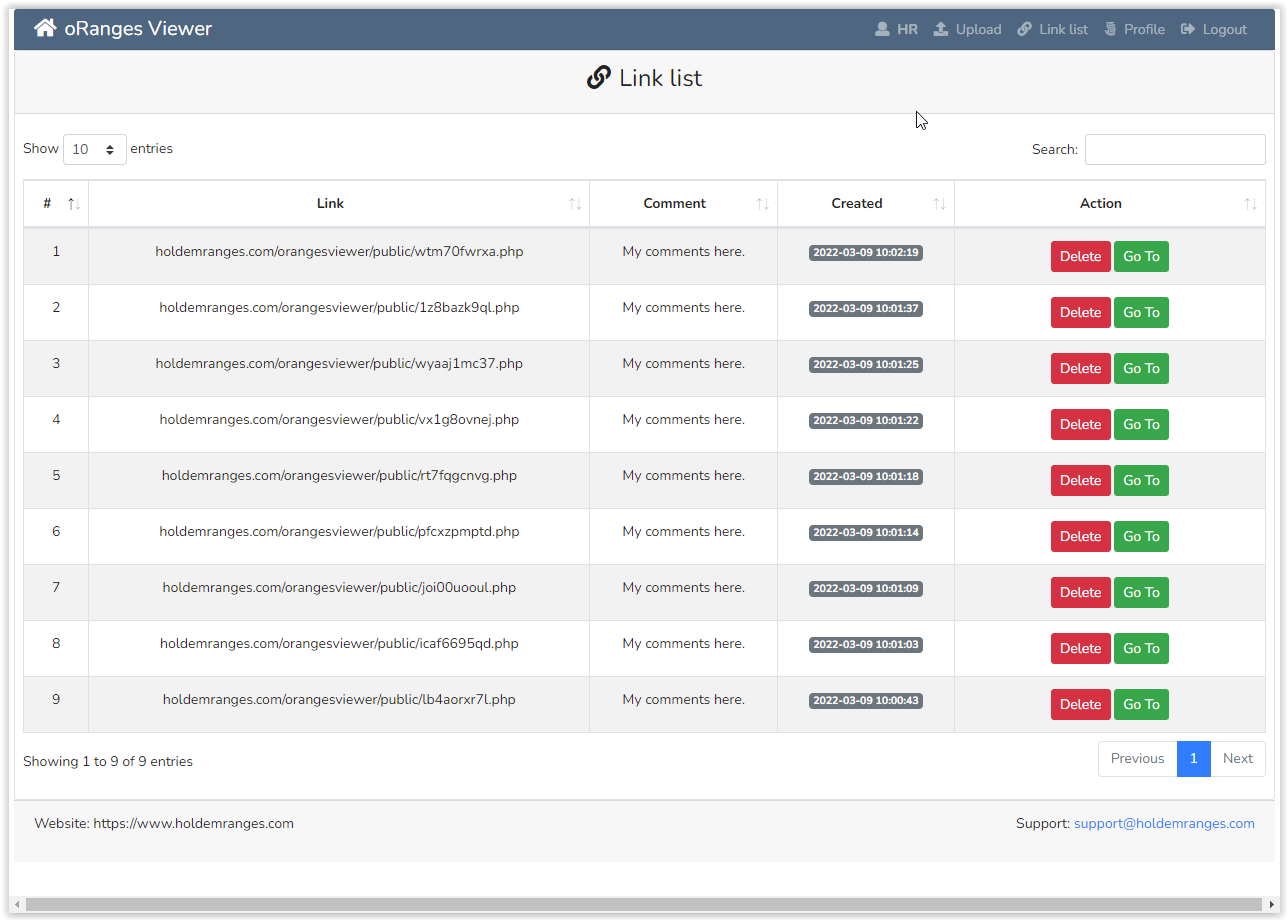
The link from the table can be viewed by clicking on the 'Go To' button or deleted by clicking on the 'Delete' button.
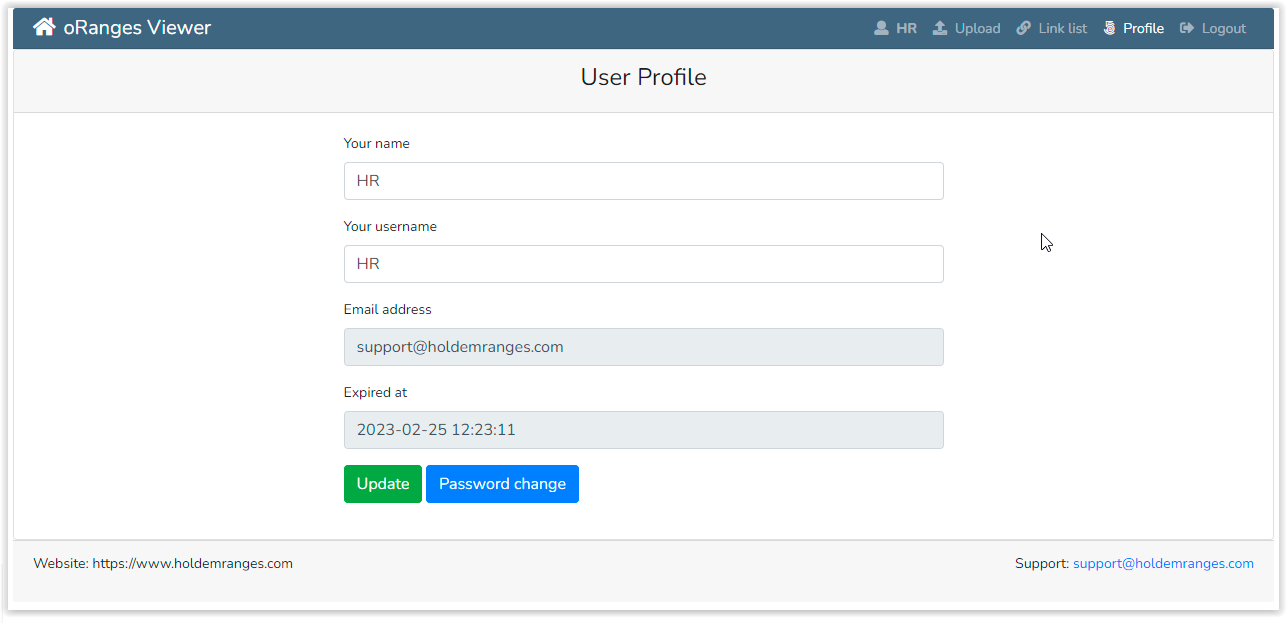
Profile
In the 'Profile' section of the menu you can view your credentials and license expiration date.
It is possible to change the password for your account here. The account password can also be changed from the oRanges Viewer client.
If you want to change your User name that is shown in the menu, then enter a new name and click the 'Update' button.